To set up Microsoft Teams Rooms: (1) create a resource account for the room, (2) assign it a Teams Rooms Pro or Basic license, (3) set the room's calendar to auto-accept, (4) mount and connect the hardware, (5) sign the device in with the room account (on Android, using the code shown on screen), and (6) configure settings and test a call. Buy a certified Teams Rooms system; don't install Teams Rooms on a regular PC.

Before you start
| Need | Detail |
|---|---|
| Certified hardware | Windows kit (compute + console + camera/audio) or Android bar + touch console. See certified devices. |
| Admin access | Microsoft 365 admin or Exchange/Teams admin rights |
| License | Teams Rooms Pro or Basic, one per room |
| Network | Wired Ethernet, PoE for consoles, firewall open per network requirements |
| Display(s) | TV or commercial display with HDMI |
Step 1: Create the resource account
Create a room mailbox in the Microsoft 365 admin center (Resources > Rooms & equipment > Add resource) or with PowerShell, then enable the account and set a password, because the device signs in with it. Details in how to create a Teams Rooms resource account.
Exclude the account from MFA and from Conditional Access policies that require user interaction, or use device-based policies instead. See sign-in problems.
Step 2: Assign a license
Assign Teams Rooms Pro or Basic to the resource account under Users > Active users > Licenses and apps. Full steps: assign a Teams Rooms license.
Step 3: Set calendar processing
So meetings show on the console with a Join button, set the room to auto-accept and keep subjects:
Set-CalendarProcessing -Identity room@contoso.com -AutomateProcessing AutoAccept -AddOrganizerToSubject $false -DeleteComments $false -DeleteSubject $false -ProcessExternalMeetingMessages $true
See Outlook conference room setup for booking options and Room Finder.
Step 4: Install the hardware
- Mount the display and the camera or video bar at the screen. See camera placement.
- Connect the touch console to PoE on the table.
- Windows kits: connect the compute to the display (HDMI), camera and audio (USB), and console (USB or network depending on model). Mount the compute behind the display or under the table.
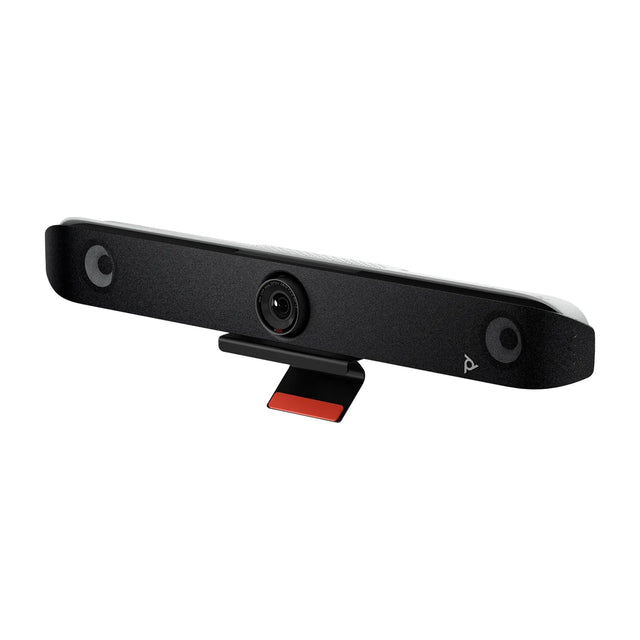
- Android bars: connect the bar to the display (HDMI), network (Ethernet) and power. Pair the console on the same network.
- Connect the HDMI ingest cable for wired sharing, if your system has one.
Brand guides: Logitech room setup, Yealink room setup, Poly setup.
Step 5: Sign in the device
Teams Rooms on Android (for example Logitech Rally Bar + Tap IP, Poly Studio X52, Yealink MeetingBar):
- Power on, choose Microsoft Teams as the provider if asked, and pair the console.
- The screen shows a sign-in code. Go to microsoft.com/devicelogin on another device and enter it, then sign in as the resource account.
- Alternatively, sign in remotely from the Teams admin center > Teams devices using the device's code.
Teams Rooms on Windows (for example Poly Studio 5 Room Compute with Logitech Tap):
- On first boot, the setup wizard asks for the resource account email and password.
- Select the camera, microphone, speaker and display defaults.
- Finish; the app restarts into the Teams Rooms home screen.
Windows devices ship with the Teams Rooms app installed by the manufacturer. Use Microsoft's recovery image only to reinstall; see Teams Rooms download and image.
Domain join or Entra join?
Windows-based rooms can be workgroup, Entra ID joined (often through Intune and Autopilot) or domain joined. Microsoft recommends against applying general user GPOs to Teams Rooms devices because they can break the app.
Step 6: Configure and test
- Device settings: On the device under More > Settings (admin password required), or remotely in the Teams admin center.
-
XML configuration (Windows): for bulk or advanced settings, deploy a
SkypeSettings.xmlfile. See Teams Rooms XML config. - Layouts: set dual-display mode, Front Row and default layouts. See layouts.
- Third-party meetings: enable direct guest join for Zoom, Webex or Google Meet. See direct guest join.
- Updates: Windows apps update through the Microsoft Store; Android devices through Microsoft's Teams device management (Teams admin center, moving to the Pro Management portal) or the vendor's portal. See update Teams Rooms.
Test checklist:
- Book a test meeting with the room and confirm it shows on the console.
- Join and check video, far-end audio and echo.
- Share content via HDMI and from a laptop in the meeting.
- Make sure the room shows in the Teams admin center as healthy.
Once rooms are live, manage them in the Teams admin center. Overview: Microsoft Teams Rooms.
Want a pre-configured Teams Room kit sized to your space? Request a free quote.
Related guides
- How to Reset or Recover a Microsoft Teams Rooms Device
- How to Set Up a Conference Room for Microsoft Teams
- Microsoft Teams Rooms Hardware: What You Need
- Microsoft Teams Rooms requirements: hardware and accounts
- Microsoft Teams Rooms: Hardware, Licenses and Setup
- Teams Rooms Basic vs Pro: license differences explained
Outfitting several rooms, or reselling? Get a volume quote or apply for wholesale pricing →